Use the bench & draw leads
The bench shelf sits under the 3D board. It holds your instruments as front panels (a supply, a function generator, probes, a potentiometer), and you connect each one to the board by drawing a lead from its jack onto the copper, exactly like clipping a probe onto a device under test.
This is the heart of circsim. Everything here happens live: turn a knob and the simulation re-solves without a restart.
Each panel lays its jacks and controls out in a single row, and the shelf scrolls sideways when the panels do not fit. Click Hide panels in the bench header to collapse the shelf to its header strip and give the board the room; Show panels brings it back. While the shelf is hidden its leads are not drawn, and circsim remembers the setting between launches.
Add an instrument
Click + Add instrument in the bench header and pick one:
| Instrument | Front-panel title | What it is |
|---|---|---|
| DC Supply | PSU | A constant voltage source with a series resistance |
| Function Gen | FUNC GEN | A sine / square / pulse / triangle source |
| Logic Input | LOGIC | A digital HI/LO driver |
| V Probe | V PROBE | Reads a net's voltage (feeds the scope) |
| I Probe | I PROBE | Clamps a component to read its current |
| Potentiometer | POT | A variable resistor (rheostat or divider) |
A new instrument lands on the shelf unwired: its jacks are hollow, and it isn't in the simulation yet. It joins the circuit the moment you wire its required terminals.
Where's the ground instrument?
Ground isn't in the palette. It mirrors whatever net you designate in the Ground & Power panel, and shows up on the shelf as a GND panel automatically. See set ground & supply.
Draw a lead
Every jack is a small circle on the front panel: filled when wired, hollow when open, and color-coded by instrument.
- Press and hold a jack. A dashed lead follows your cursor up into the 3D view.
- Move over the board. circsim highlights the net (or, for a current probe, the component) you're about to land on.
- Release on copper to clip the lead to that net. The jack fills in and a solid wire is drawn from the panel to an alligator-clip marker on the board.
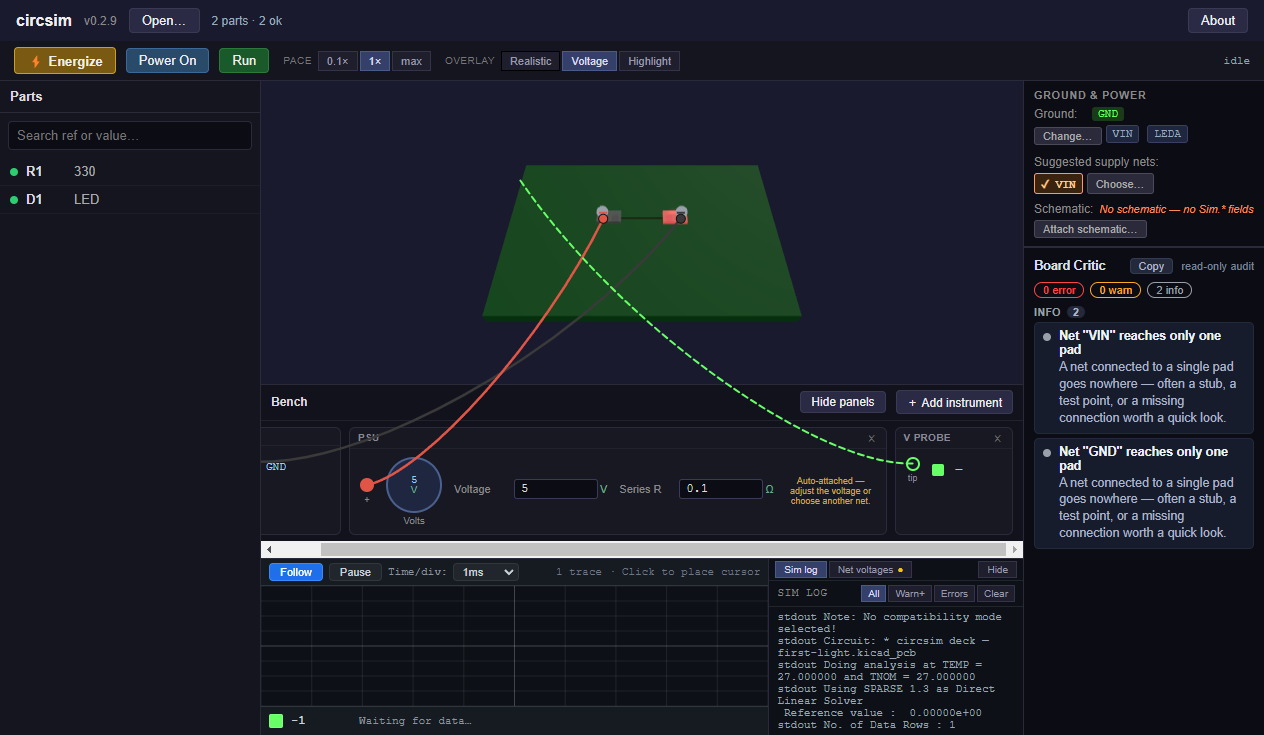
(Above: a lead in mid-drag. The dashed wire follows the cursor from the V-Probe's jack up to the board. Drop it on copper to clip it on.)
The lead stays attached to that copper as you orbit and zoom. It tracks the board in 3D.
Leads attach even under a component
If a net's only exposed copper sits directly under a component body, don't worry: circsim's hit-test sees the net through the part, so the lead still clips to the net. You don't have to hunt for a bare stretch of trace.
Re-route or detach
- Re-route: grab the alligator-clip marker on the board and drag it to a different net.
- Detach: drag the clip off the board and release. The lead comes off (the instrument stays on the shelf). Ground never detaches this way. Change it in Ground & Power.
- Cancel a drag: press Escape mid-drag.
- Remove the whole instrument: the
×on its front-panel title bar.
The front panels
Every control drives the running simulation immediately.
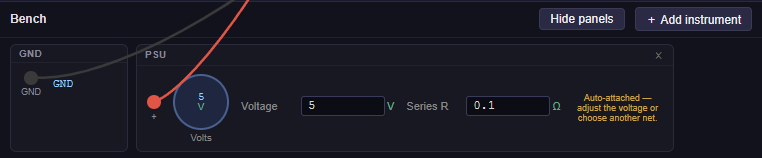
DC Supply (PSU)
- Volts knob (0 V to 30 V) and a matching Voltage field: drag the knob or type a value.
- Source R (series resistance): the supply's internal resistance (default 0.1 Ω). Raise it to model a current-limited or weak source.
- Jack: red +. (Return is through your designated ground.)
- A supply that Energize attached for you carries an amber "Auto-attached" note until you touch it.
Function Gen (FUNC GEN)
- Wave:
sine/square/pulse/triangle. - Freq knob: 1 Hz to 1 MHz, logarithmic (so low frequencies get fine control).
- Amp knob: amplitude, 0 V to 20 V.
- Offset knob: DC offset, ±20 V.
- Duty knob: 1% to 99%, shown only for square/pulse.
- Jack: yellow out.
Logic Input (LOGIC)
- LO / HI toggle: drives the net to 0 or to your high level.
- High level (V High): the logic-high voltage (default 3.3 V; set it to match your rail).
- Jack: purple out.
Potentiometer (POT)
- Variable resistor / Voltage divider mode toggle.
- Variable resistor (a rheostat; 2 terminals A, W): a variable resistor, the classic dimmer wiring.
- Voltage divider (3 terminals A, W, Lo): a true three-terminal voltage divider; W is the wiper tap.
- Wiper knob: 0% to 100%.
- Total resistance (Total R): the full end-to-end resistance (default 10 kΩ).
- Switching modes keeps the A and W wires and only adds or drops the Lo terminal.
V Probe / I Probe
- V Probe: a color swatch (its scope trace color) and a live readout of the probed net's last operating-point voltage. Its tip jack clips to a net.
- I Probe: clamps onto a component (drop its clamp jack on the part, not a net) and reads that part's current.
Turn a knob, watch it change
Once the board is energized (an operating point is showing), editing any instrument triggers a live re-solve. Drag the supply down and an LED dims; sweep a pot wiper and a divider output moves; retune a function generator and the scope trace follows. No restart, no "run again."
Under the hood, a value change becomes a SPICE alter (an in-place tweak to a value, no rebuild); a wiring change (moving a lead to a different net) reloads the circuit, because the topology actually changed. circsim picks the right one for you.
Saving the bench
The bench is never written into your board file (circsim doesn't touch your design files). Instead, circsim can save it, with the ground, your Model Doctor overrides and your models, in a small my-board.circsim.json beside the board. Click Save setup in the bar under the toolbar once, and a reopen or restart restores the instruments and leads (each lead remembers where on the board you clipped it). Until you do, the bench lives for the current session only. See Save your setup & export a report.
Next
- Probe nets & read the scope
- Energize & read the operating point
- Bench instruments reference: every parameter and its SPICE mapping.